
A Simple Guide to Designing Your Own Lanyards
Have you ever picked up a lanyard and thought that,
“Why does this feel so dull?”
Now consider a totally opposite scenario. A lanyard that actually makes people think of it twice. This matches your brand, voice, or mood. This sounds small, right?
But the truth is, lanyards are everywhere. You see them at offices, events, schools, and concerts. Most of them are forgettable because they’re too boring.
We’re not talking about stiff rules or design jargon. We’re talking about fun choices, smart ideas, and creative freedom. The kind that makes designing custom lanyards feel exciting, not confusing.
- Do colours really matter?
- Should it be simple or loud?
- What even makes a lanyard look cool?
They are all good questions, and we will answer them all. By the end of this guide, you won’t just understand custom lanyards, but you’ll know how to design one that actually feels right.
Let’s get creative without making it complicated.
Why Custom Lanyards Are Fun and Useful
Have you ever grabbed a lanyard and thought no, because it has plain straps and nothing exciting? Now think of a lanyard with bright colors, small patterns, or even a tiny logo you like. Suddenly, it is not just a strap, but it is something that shows style. People pay attention to it, and honestly, it makes you feel a bit cooler.
Custom lanyards aren’t only for holding IDs. They can:
- Make your uniform or outfit pop
- Show off your brand or team
- Make everyone feel included in the group
Even small changes, like a color or clip style, can make a simple lanyard feel new. It is like giving a simple shirt a fresh splash of paint, which makes a difference.
Step 1: Choosing the Right Lanyard Style
So, first things first, like what kind of lanyard do you want? There are a few options, including flat, round, thin, and thick straps. Each feels different in your hand and looks different around your neck.
If you’re in Dublin, for example, and looking for lanyards in Dublin for an event or team, think about the people who will wear them. Will it be for everyday use or a one-time event?
- Flat lanyards are easy and simple to print the designs on.
- Round lanyards feel soft and nice for casual wear.
- Thick straps are more durable and give a luxurious look.
Tip: Don’t wear it all day because comfort matters as much as style. A lanyard that looks great and feels scratchy isn’t fun for anyone.
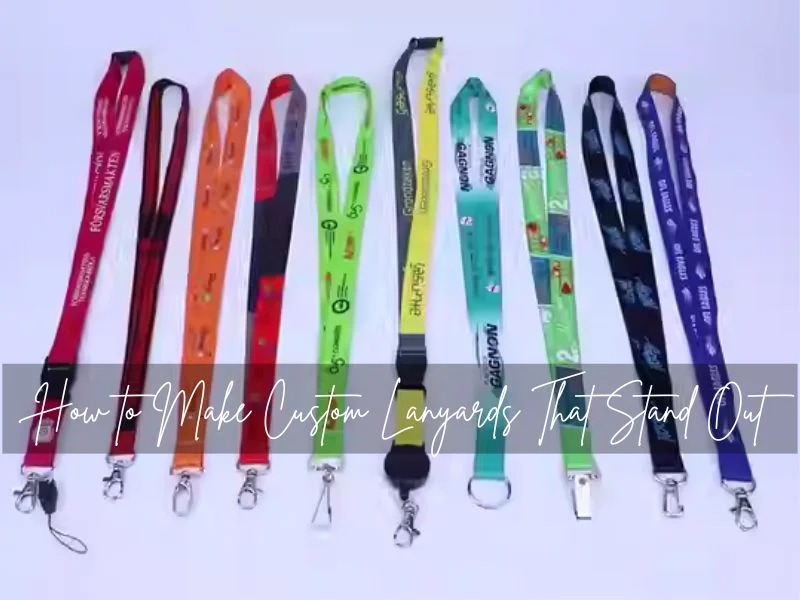
Step 2: Picking Colours and Patterns
Colours can completely change how a lanyard feels. Bright colours make it playful and eye-catching. Muted tones make it look professional. Patterns can be subtle, like stripes, or bold, like tiny illustrations or logos.
Think about your audience. If it’s for a school event, playful colours might work best. For a corporate team, a sleek color with a simple design feels smarter. The right combination can make people want to actually carry the lanyard with confidence.
Materials also impact color choices. Satin straps show colors differently from polyester or cotton. Sometimes a vibrant red on polyester will pop, but on satin it might look softer. Experimenting helps you get the exact look you want.
You can also match colours to your brand, team, or event theme. A lanyard doesn’t have to be just functional, but it can reflect identity. Think of someone noticing your design and asking,
“Where did you get that?”
That’s when your lanyard works like a tiny conversation starter.
Step 3: Adding Text, Logos, or Fun Elements
Once you have got the colors and style, it is time to get creative. Logos, text, and other fun elements can make a lanyard truly look yours. Even small details, like a tiny symbol or a short tagline, can make it stand out.
Some people like to match their lanyards with other accessories. For example, if you’re making custom wristbands for an event, you can use the same colours or designs on your lanyards. It ties everything together and gives a neat, coordinated look.
It’s not about overloading the lanyard with designs. Sometimes, less feels a lot. A single bold or small repeating design can be more attractive than a cluttered design. The goal is to make it feel personal and still comfortable to wear.
Step 4: Finishing Touches and Printing Tips
After choosing the style, colour, and design, the last step is making sure your lanyard comes out perfect. Small details can make a big difference. Think about the clip or hook; it needs to be sturdy but easy to use. The stitching should feel strong so the lanyard lasts.
When it comes to printing, different methods give different results. Screen printing makes colours bright and bold, while sublimation can create smooth gradients and complex patterns. Choosing the right printing style depends on your design and how many lanyards you need.
It’s also helpful to order a sample first. Hold it, feel it, and see how the design looks in real life. Sometimes colours look slightly different on the material than on a screen, and that little check can save a lot of surprises later.
The Ending Notes
Designing custom lanyards is easier than it seems. It’s not about following strict rules or making something perfect, but it’s about having fun and being creative. From choosing the style, colours, and patterns to adding logos or small personal touches, every step lets you show a bit of personality.
The best lanyards aren’t just functional, but they also make people notice, start a conversation, and even make events feel lively. Matching them with a personal wristband or other accessories adds a finishing touch that makes things feel special and coordinated.
Keep in mind that small details matter. The right clip, clear printing, and sturdy stitching make a huge difference in how your design feels and how long it will last. Don’t be afraid to test ideas and see what works best.
At the end of the day, your lanyard can be more than just a strap. It can be a tiny piece of creativity that stands out, connects people, and makes your event, team, or brand memorable.
I am the author at IrelandLanyards.ie, passionate about helping people discover the best ways to design and order custom lanyards. My blogs simplify technical details into actionable tips readers can really use. I focus on boosting creativity, clarity, and confidence. My aim is to make every lanyard project a success.